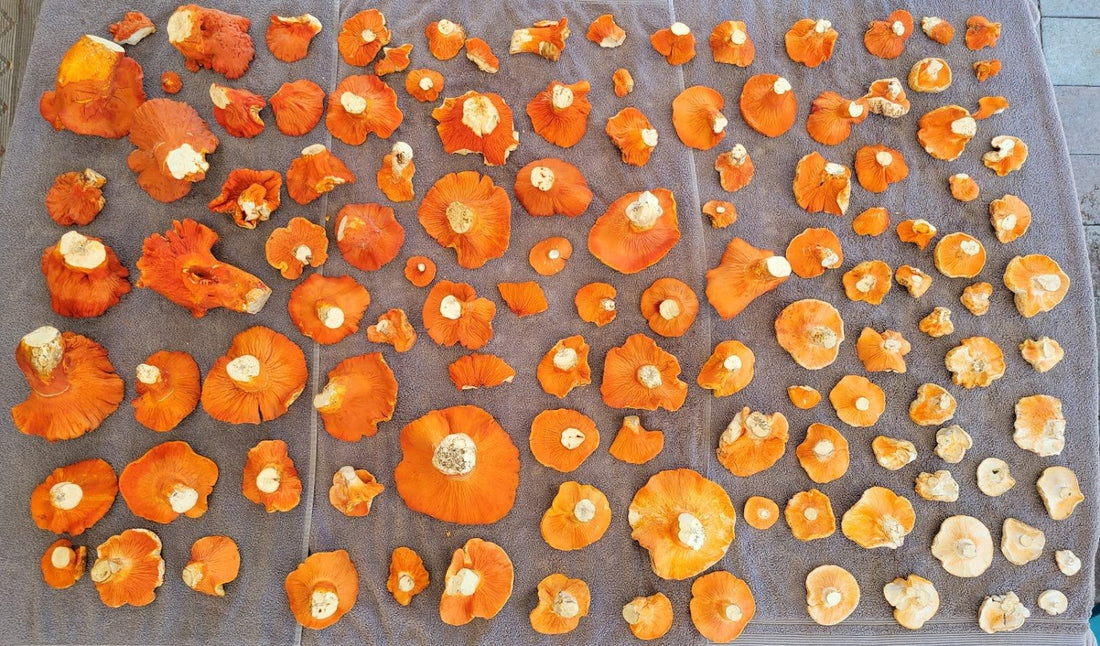

“50 Shades of Lobster Mushroom”
Roughly #20 of freshly cleaned Lobster Mushrooms resting on towels before being sliced and dehydrated.
Disclaimer: Eating foraged/wild mushrooms is not a game. You should never consume any mushroom without being 100% positive of its identity and edibility. All wild mushrooms should be cooked thoroughly and only a very small amount should be eaten if it is a new species to you, to test for any intolerance.

The author, enjoying a cup of coffee after cleaning the day’s harvest of Chanterelle, Porcini and Lobster Mushrooms. Note the loose knot in the hose on the sink faucet. This lower position allows for a stronger spray without water splashing out of the sink.
Hi there! I’m so thrilled you found your way to my little fungi-focused chunk of the internet, and truly hope that you find something here that enriches your experience with these wonderful creations of nature. This blog will focus on how to clean 10 different Foraged Mushrooms, but if you’re looking for tips on how to clean and store “grocery store” mushrooms (Agaricus bisporus), Jacqueline Weiss from EatingWell magazine recently wrote a wonderful article that I was honored to contribute to!
“How do I clean these mushrooms?” is one of the most common questions on so many mushroom forums these days! In this short blog, I’ll do my best to quickly but thoroughly cover the best tips and tricks for cleaning ten common Wild Mushrooms! Before we dive into how to clean each one, I thought a couple general tips for foraging/storing would be appropriate, to hopefully save you some time and effort in the long run!
-
Forage Clean: This may seem obvious, but the less dirt that you bring home in your basket, the less cleaning that you have to do later on! This means cutting the dirty base off if you plucked the mushroom, and usually giving it a quick cleaning with a brush or blowing on it to remove debris *before it goes in your basket*. You also need to know when to make the judgment call of when a mushroom is just too dirty to be worth cleaning! Chanterelles, for example, often get a “rosecomb” growth pattern that leaves dirt and needles embedded deep into the flesh!
-
Harvesting Container: Know your intended species and also the flora of the area you will be picking mushrooms. Use a container with firm sides, breathability, and holes in the bottom large enough to let debris from the area fall through, but small enough that young specimens of your intended species won’t fall through or be damaged. When just touching a branch sends a cascade of fir needles raining down upon you and your harvest, it’s best to let at least some of them naturally make their way back to the forest. 🙂
-
Rinse Just Before Cooking: If you’re going to use water to rinse your mushrooms, you generally only want to do so directly before cooking them. Many species will have a shorter shelf life if they’re rinsed before storage, especially if they’re not allowed to dry properly before being put away.
-
Methods Will Vary By Exact Species: In an effort to keep this blog short and be as helpful as possible, some of these will be general tips for how to clean each genus of wild mushroom, which can often have a dozen or more species in it! These species vary in morphology and so these tips may vary a bit, depending on which exact species you have!
-
Trimming: Use your best judgement to discard any sections of mushroom that are discolored, soft to the touch (when it shouldn’t be), or otherwise suspect! Cut well around the affected area, and never eat anything you’re unsure of!
-
Scraping: Many mushrooms can get dirt/grit embedded just into their flesh, which can be extremely difficult to just brush off. As an alternative to rinsing, consider scraping the mushroom with a paring knife to remove the first layer of flesh, especially when the dirt is just embedded into the stem.
- Salad Spinner: if you're in a hurry or just want to speed up the drying process, many mushrooms can be tossed in a salad spinner to give them a quick dry! Be careful with some more fragile mushrooms, but hearty species like morels don't mind a quick spin.

-
BOLETES / PORCINI / BOLETUS
Trim the base in a V shape while foraging to remove dirt while preserving as much flesh as possible. Use a damp towel to brush off dirt/sand from the cap and stem. If you need to, you can lightly rinse them and brush with a towel to remove further debris. Be sure to closely inspect for and remove sand, if you find them in a sandy/coastal area, it only takes one little crunch to ruin a delicious bite! Be wary of rinsing larger specimens with open pores: while most mushrooms aren’t the sponges that people think they are, the pore layer of mature Porcini *is* a lot like a sponge, and can absorb a lot of water.
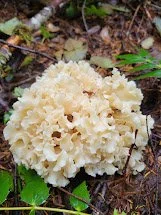
2. CAULIFLOWER / SPARASSIS
Fully remove the dirty/woody base where the mushroom was attached to the ground or buried wood, and inspect for discoloration/worm holes. Break the mushroom vertically into smaller chunks to expose the interior, and remove any sticks/larger debris. Clean your sink and then fill it with cold water, or use a large bowl. Plunge the mushroom chunks into the water and swish them around with your hand several times. Dirt will fall to the bottom, needles will rise to the top, and you can carefully remove the clean chunks of mushroom from the middle. If necessary, drain the used water and repeat multiple times.

3. CHANTERELLES / CANTHARELLUS
Place mushrooms in a large colander, roughly halfway full. A kitchen sink with a “spray” setting on the faucet works best, here. Spray the whole colander with cool water on fairly firm pressure, hitting the mushrooms from as many angles as possible to encourage needles and dirt to drain to the bottom. Then, take each mushroom individually and spray into the “ridges” to remove debris, as well as spraying off the top for any needles or dirt. Use a paring knife to remove any detritus, and a damp kitchen towel for any stubborn dirt/mud. Once you’ve removed all visible debris, place on a kitchen towel to dry.
Alternatively: you can dump your Chanterelles out on butcher paper overnight to dry a bit, then brush them individually with a trimmed paintbrush the next morning to remove any debris, trimming where necessary. The majority of them won’t require rinsing with this method, and you can just rinse those that really need it. Leaving Chanterelles out overnight to dry can also help with overall shelf life and product quality, as they are often quite wet when you pick them and this can lead to mold in many storage conditions. Thanks to Dawn Castleman for this fantastic tip!
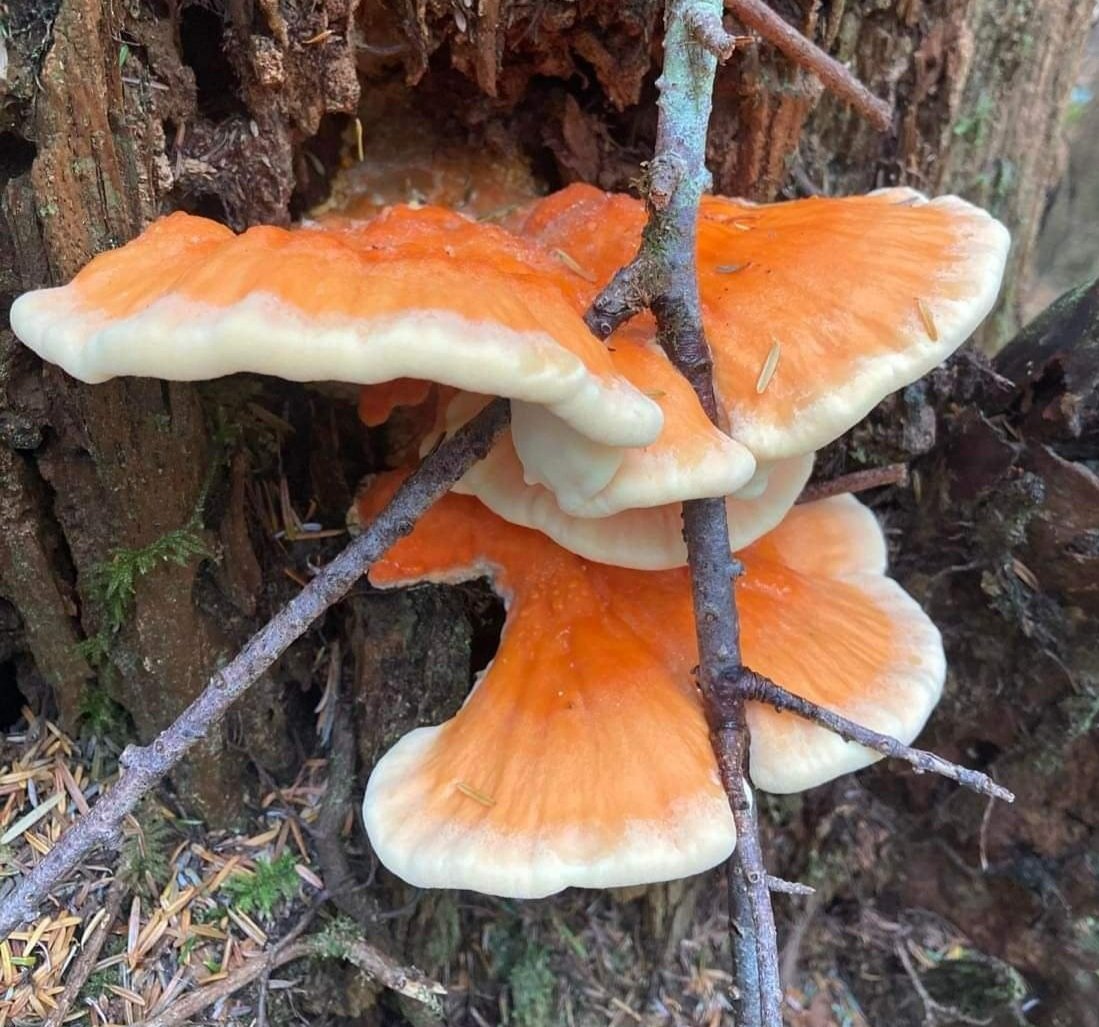
Photo credit: Susan Griswold
4. CHICKEN OF THE WOODS / LAETIPORUS
Break into individual brackets. Cut away the hard/dirty base that was attached to the tree, as well as any imbedded needles, sticks or debris. Use a damp towel to brush away any dirt on the exterior. You can give also give a quick rinse if you like, but soaking these mushrooms is inadvisable, and be sure to give a little extra cooking time to release any water absorbed!
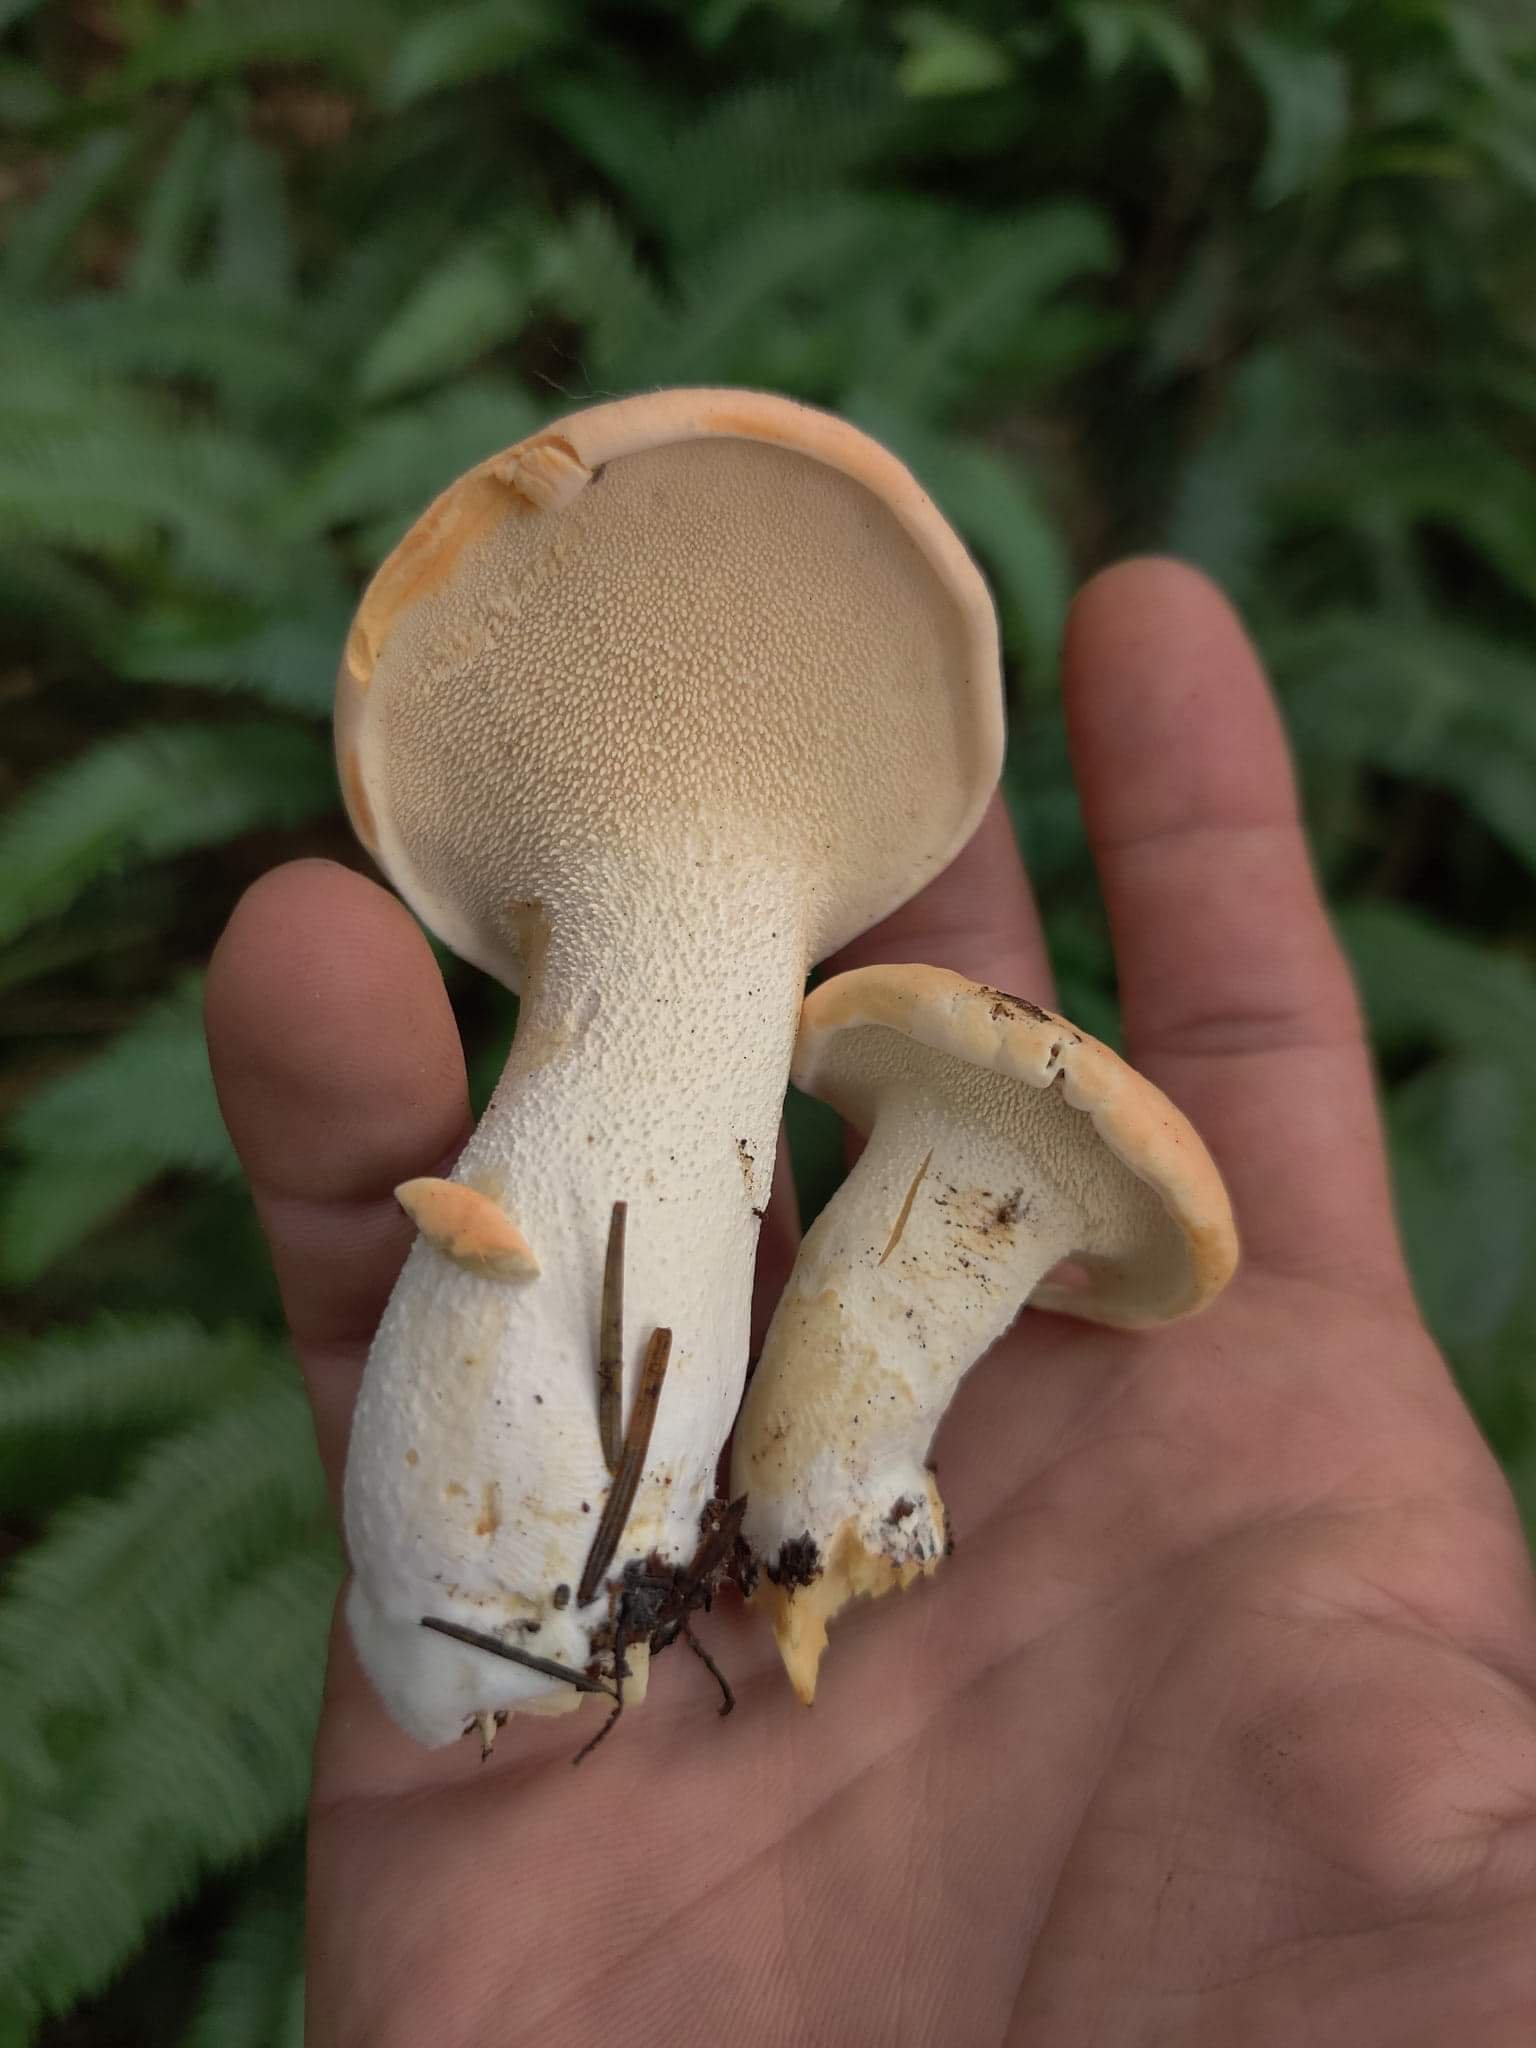
Photo credit: Eric Badeau
5. HEDGEHOG / HYDNUM
Brush the top of the cap with a damp towel, and use a paring knife to remove dirt and debris from the “teeth” on the underside. If the mushroom is mature, consider scaping the teeth away entirely, as their flavor is often bitter in older specimens! If these mushrooms are growing in sub-prime conditions and start out dirty, they can be a real pain to clean. Don’t hesitate to scrape teeth away to get rid of the detritus caught inside them. Depending on your cooking method, lots of those teeth are going to fall off anyway, and they don’t really add much to a meal!

6. LOBSTER MUSHROOMS / HYPOMYCES LACTIFLUORUM
Time Lapse of cleaning #25 of Lobster Mushrooms in my backyard, Summer 2021.
When foraging these mushrooms, ma
Make sure to cut the dirty base, then flip the mushroom upside down and give it several solid taps to empty the “funnel” shape of any collected dirt. They’re pretty easy to clean using this hose method, but they’re also quite heavy and can smash dirt/mud into each other while you walk, which can lead to extra time spent trimming and more waste!
For large quantities: Attach a spray nozzle to a food-grade water hose. Set the spray nozzle to a “fan” or “line” setting, and use medium to high water pressure. Direct the spray at any debris on the mushrooms and blast it away. Lobster Mushrooms are a very, very firm mushroom and can handle quite high pressure. Any small bits of mushroom that get blasted away weren’t worth eating in the first place. Liberally trim any obvious brown/discolored areas with a paring knife. As noted in the general tips at the beginning of this blog: using water to clean your mushrooms can effect their shelf life, so only use this method if you can eat/process a large quantity of Lobster Mushrooms at one time! Many of my mushrooms are used for dyeing purposes, and the rest go into my three dehydrators soon after being washed.
If you only found a few or are just cleaning enough for a meal, just take them to the sink and blast them with the highest pressure you can get, again liberally trimming away any brown/discolored areas! Above is a time lapse video of me cleaning about #25 of Lobster Mushrooms in under an hour. 🙂
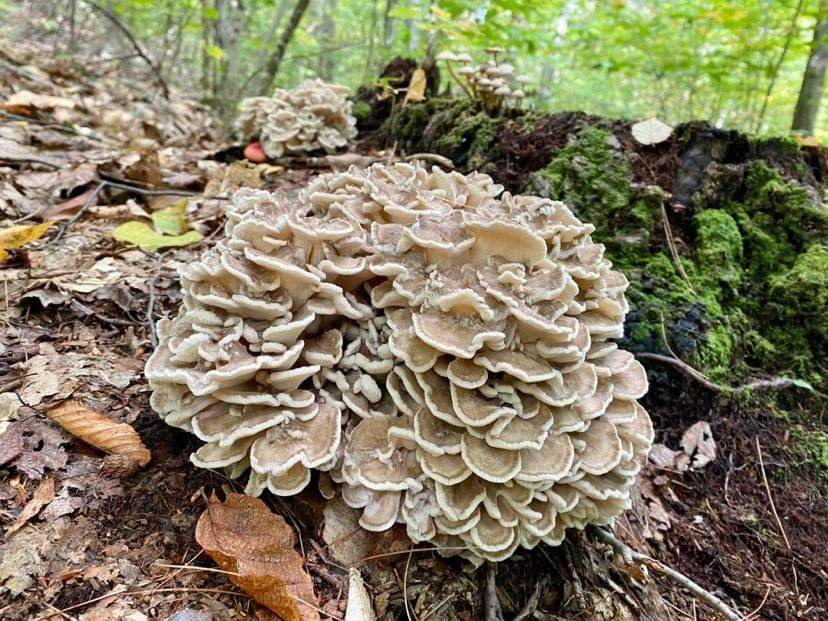
Photo credit: Christine Gagnon (Lady Chaga)
7. HEN OF THE WOODS / MAITAKE / GRIFOLA FRONDOSA
These mushrooms are also notoriously difficult to clean, and often filled with small life forms! Cut them above the dirt line when harvesting, then give them a few solid smacks against the ground or a nearby tree to dislodge some of the bugs, plus any dirt and sticks that have probably been caught up in it during the growth cycle. My good friend Christine Gagnon AKA Lady Chaga, (who helped me with tips for this species that doesn’t grow in my area) even had a black-spotted salamander jump out of a Maitake and into her basket last year! Trim any parts that are too embedded/filthy, and any orange parts (orange = old). Break it into sections, and work on each one individually with a damp towel, checking for bugs, dirt, larvae and bug poop! Lady Chaga also suggests using your hands to break apart these mushrooms instead of a knife, so you don’t accidentally murder any salamanders! 😉 Alternatively to brushing, you can plunge these smaller sections into a large bowl of water and agitate to remove debris, but you may want to be more thorough than this, depending on the specimen. Pat firmly between kitchen towels before cooking, if you do use water to clean!


8. MATSUTAKE / PINE MUSHROOM / TRICHOLOMA
Brush the cap with a damp towel to remove dirt and needles. Use a paring knife for any stubborn/embedded pieces. You can also brush the stem to try and remove dirt, but this is one mushroom in particular that I find benefits from the scraping technique. Drag the blade of your paring knife along the length of the stipe, gently removing just the first layer of flesh that has all the dirt and needles on the outside. Peeling the caps of more mature specimens is also an option, but does not work well on younger/dryer mushrooms. Be sure to trim the sandy base off the stem before it goes in your basket!!

9. MORELS / MORCHELLA
Inspect the outside lobes, especially if you’ve been foraging in a place prone to fungus gnats. Larvae sometimes hide/make cottony homes in these crevices. Cut each mushroom in half, top to bottom. Inspect the inside for friends: worms, ants, centipedes, etc. Remove the friends. The hollow stem of morels is a common hiding place for bugs of all sorts. Place the mushrooms in a large bowl filled with cold water. Plunge and agitate them several times to dislodge any dirt and debris, for 30 seconds to one minute. Do not soak. Remove from water and place on towels to dry.

Twelve pounds of Morchella tridentina and M. snyderi ready for 8 hours in the fridge to kill larvae.
Bonus Tip: Many of our “burn morel” and some of our “natural mountain” species here in the Pacific Northwest are well known to often host the larvae of fungus gnats. To eject these inhabitants and prevent further damage/hatching, as well as them crawling to un-infected morels stored in the same area, there is a simple, effective trick! Simply take your morels and place them in Ziploc bag, suck the air out with your mouth, then leave that bag in the fridge for 8 hours. The larvae will crawl out of the morels and cling to the sides of the plastic searching for air. After the 8 hours is up, just dump your morels out of the plastic bag and store in paper/cardboard as usual. The short stint in plastic does not harm the morels at all. 🙂
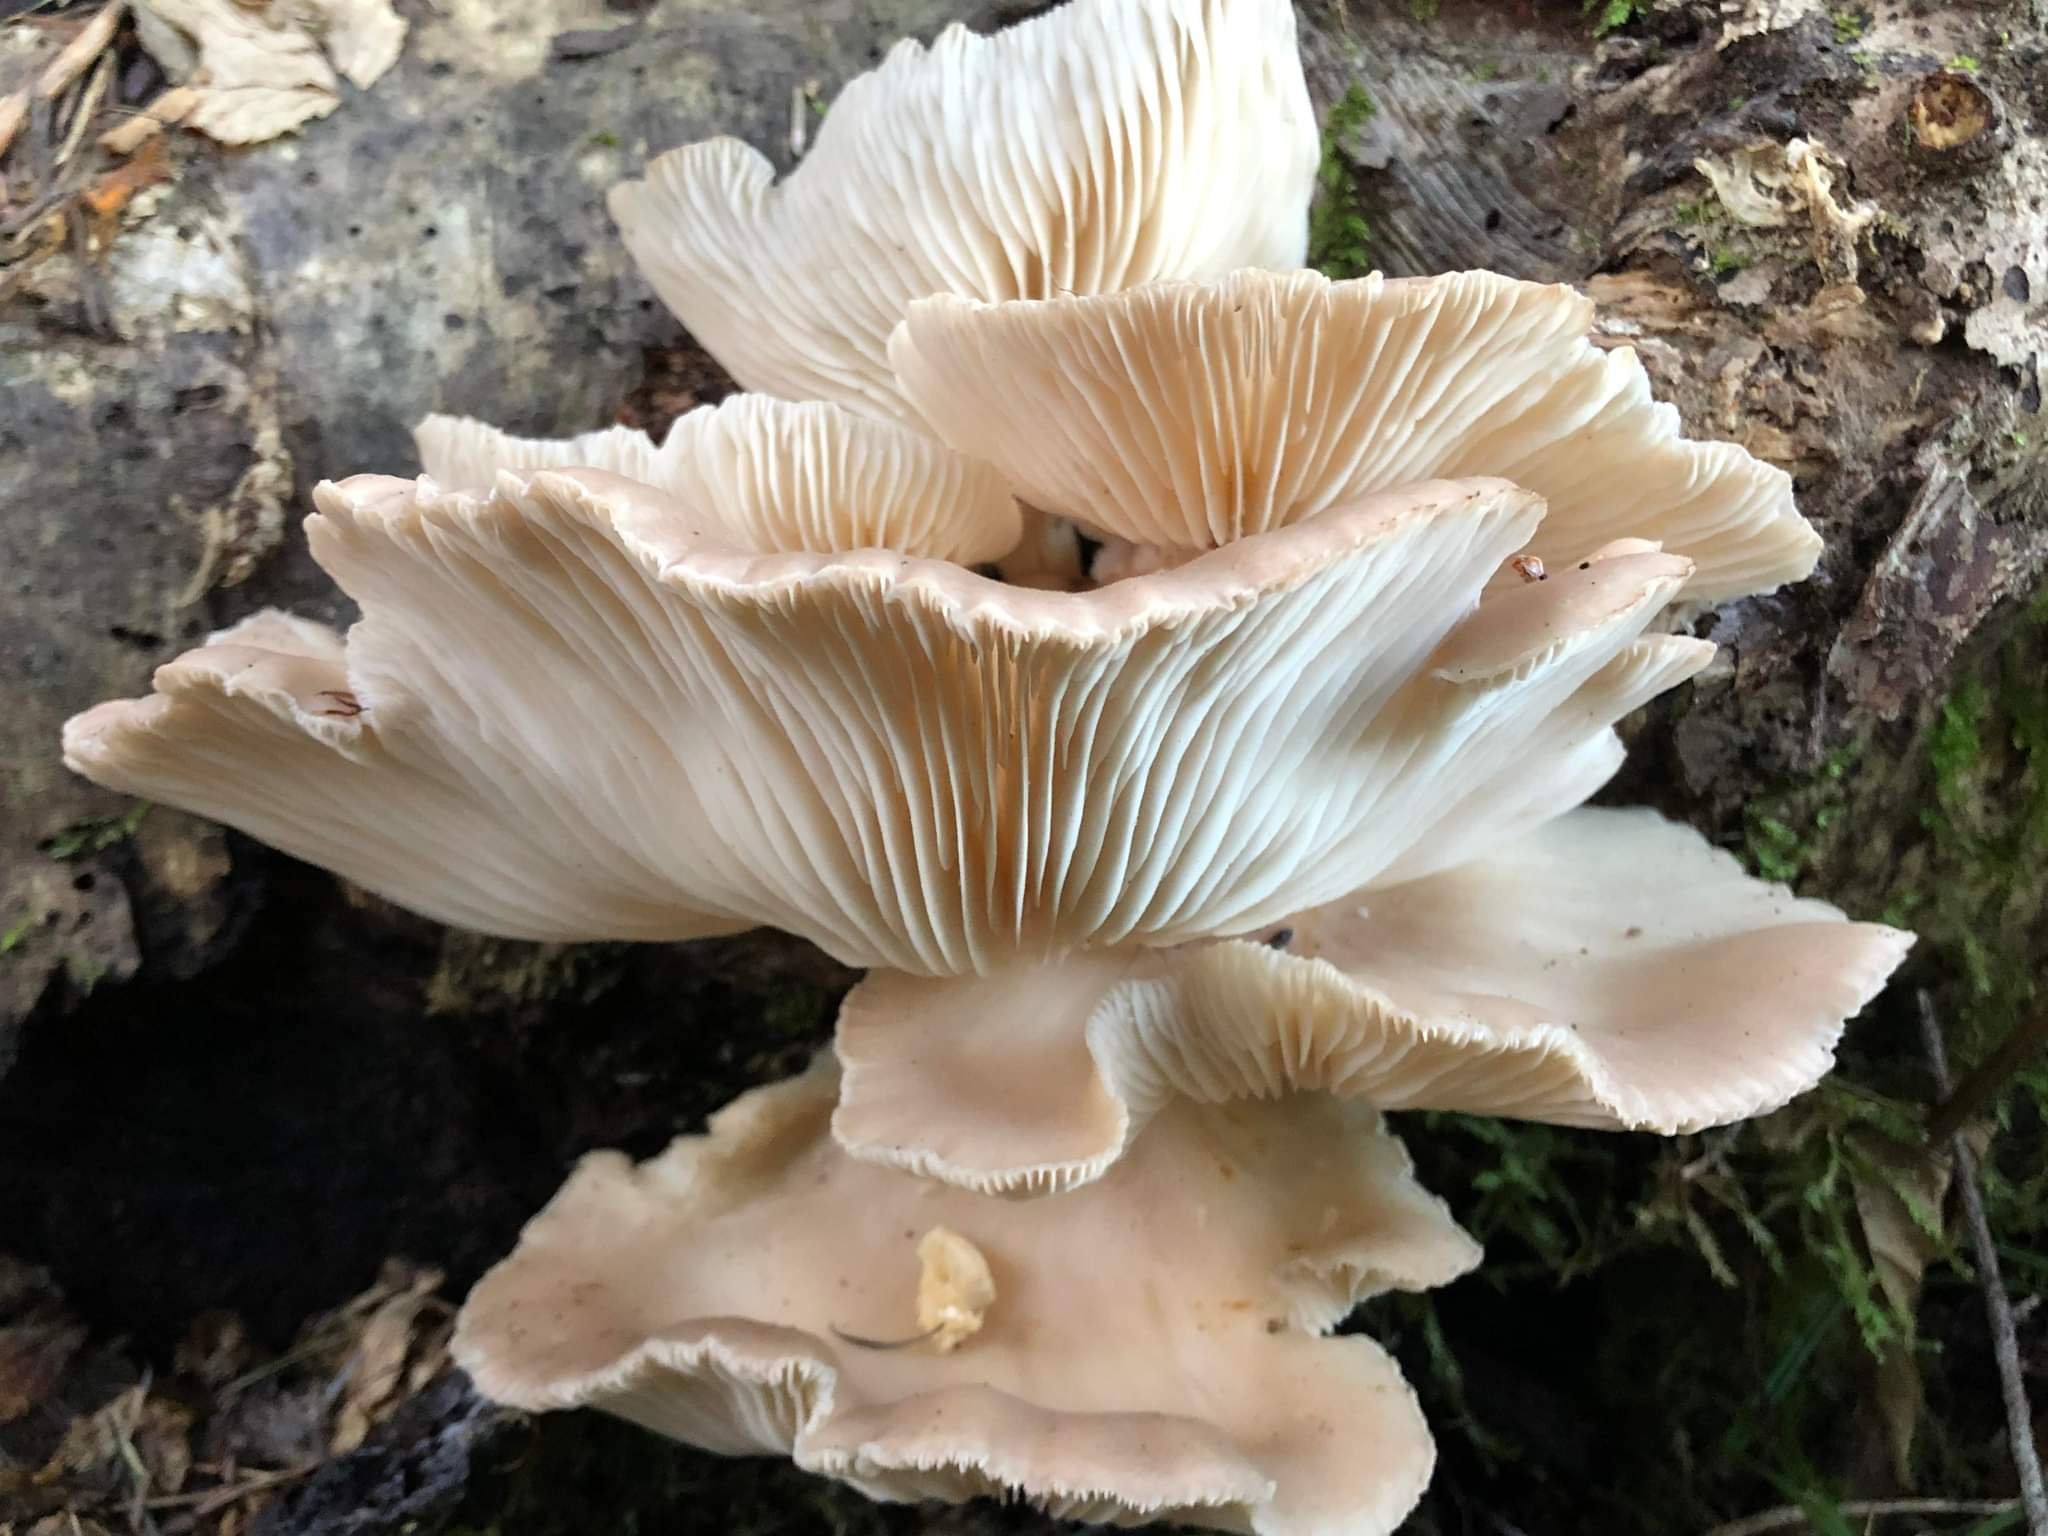
Photo credit: Jenn Avery
10. OYSTERS / PLEUROTUS
Oyster mushrooms are *usually* pretty clean, but they can pick up some dirt/bark depending on the tree they’re growing from! Take a damp towel and wipe off the top of the cap, and brush what you can from the gills. Use a paring knife to further remove any debris from both cap and gills. If really needed you can give them a rinse, but their large gills are prone to collecting water: be sure to either let them dry out or give them some extra time in the frying pan!
Well, I tried my best to keep it short! Thank you again for taking the time to read my little blog, and for checking out my wife Suzi’s Mushroom Stickers if you happen to do so! Hopefully you picked up a trick or two to help you with your next after-forage cleaning party! If there’s any tips that you think should be included here, or if you have suggestions for more varieties you’d like cleaning tricks for, please feel free to leave a comment below. You can also Contact Us through our contact page, or give us a shout on any of our Social Media profiles which can be found on our LinkTree! For real: I love to talk about mushrooms, pretty much anything about them. Ask away!
1 comment
Good advice, thanks