
How does one go about turning fungus-infested wood decaying on the forest floor into adorable keepsakes?
Let’s find out!
Disclaimer: This guide is meant as a vague set of instructions to understand how to obtain the shape of a Porcini. Do not attempt to exactly copy my setup or examples. These photos were taken for the purpose of showing angles and technique, and are not meant to be a guide for the proper setup or use of any machine or tool. Proper safety precautions and equipment should be used at all times. You are personally responsible for understanding and properly using any equipment that you choose to use. It is not my fault if you hurt yourself. Does that cover it? 🙂
Step 1: Forage!

Close-up of Chlorociboria fruiting bodies
Before you can begin the woodworking process, first you have to find this specially colored wood! The fungus which creates this amazing color is called Chlorociboria, which I did write a little blog on if you feel like delving deeper! If you’ve ever foraged for mushrooms or plants before, or spent much time in the woods, you may have seen these ethereal blue cup fungi sprouting off of downed logs or other decaying wood. The fruiting bodies themselves often grow on the underside of the wood, and are not visible until you lift it out of the duff. On top of that, the actual little cups are (supposedly) fairly rare, although my own experience has been that they grow in mass quantities on almost every log they colonize, given a bit of rain. When searching for the wood, areas with downed or decaying hardwood trees like ash, oak, poplar, aspen, and vine maple are a good place to start. Chlorociboria is widespread in North America, and common on both the Western and Eastern sides of the United States.


Interior of Chlorociboria stained branch, photo credit Christine Gagnon (Lady Chaga)

Pile of wood big enough to annoy your partner
Finding a piece that is stained enough to look nice and still solid enough to work with may take a little effort, but stick with it and you’ll have a pile of wood that will annoy your partner for weeks!
Which brings us to step 2…

Dehydrating blanks and branches
Step 2: Drying The Wood
If the wood you collected was wet, it’ll need to dry out before use. If you collected some larger, solid pieces and want to keep them in a humid place to encourage more green staining to occur, that is up to you. While slow-drying may be best for larger pieces and purists, my speed-dry setup with a heat lamp / fan combo seems to expediate the process without causing any issues later on. If I am pressed for time, I even dry out the smaller chunks in a food dehydrator, once I break them down in… Step 3!
Step 3: Cutting Wood Down to Size

Rough block with visible blue fruiting bodies
If your wood is dry enough and viable for a project, then the next step is to cut your foraged goods down into smaller pieces, each one a bit larger than the eventual mushroom you intend to make. The size is up to you, but keep in mind that larger pieces are more prone to cracks and flaws. A good hand saw will work to get them down to size, but as long as you’re taking all the proper safety precautions and have your PPE, then use whatever tools you like for this step.

Rough blocks of Chlorociboria-stained wood
You can see that the interior of these rough chunks is well-stained, but notice that there are cracks running through parts of it as well. For different projects, those large cracks might be filled with epoxy, or if they don’t actually effect the structural integrity of the piece, I’ll often just leave them in. If they are weakening the wood to the point where it might be a danger to a finished piece breaking, I just take a pair of pruning shears along the fault line and carefully snip it apart.

Using pruning shears along the crack

This can leave you with two smaller, usable pieces

Step 4: Sand Rough Blanks Into Smooth Blocks
For this step, I use a 1”x30” Vertical Belt Sander with a 50 or 80 grit sanding belt attached. If you have a smooth surface from cutting, you can rest that flat on the table and turn the piece slowly, grinding off the outer layers of bark, dirt and debris. That will leave you with a sanded, cylindrical shape.


Bowl of roughly sanded Chlorociboria wood blanks for projects
Step 5: Shaping the Porcini!
Now that you have a smooth, usable shape to work with, the actual shaping of the porcini can begin. To start, put your sanded block at an angle to the belt like so, roughly 2/3 of the way up the side.


Rotate the sanded block all the way around at this angle, taking care to keep roughly the same distance from the top, and watching for burn marks where the side of the belt meets the underside of the cap. This should result in a shape like the photo shown.

Carefully round out the top of the cap.

Use roughly the same technique to round out the bottom of the mushroom.

Switch belt to 120 grit, smooth entire surface.
Step 6: Hand Sanding/Finishing
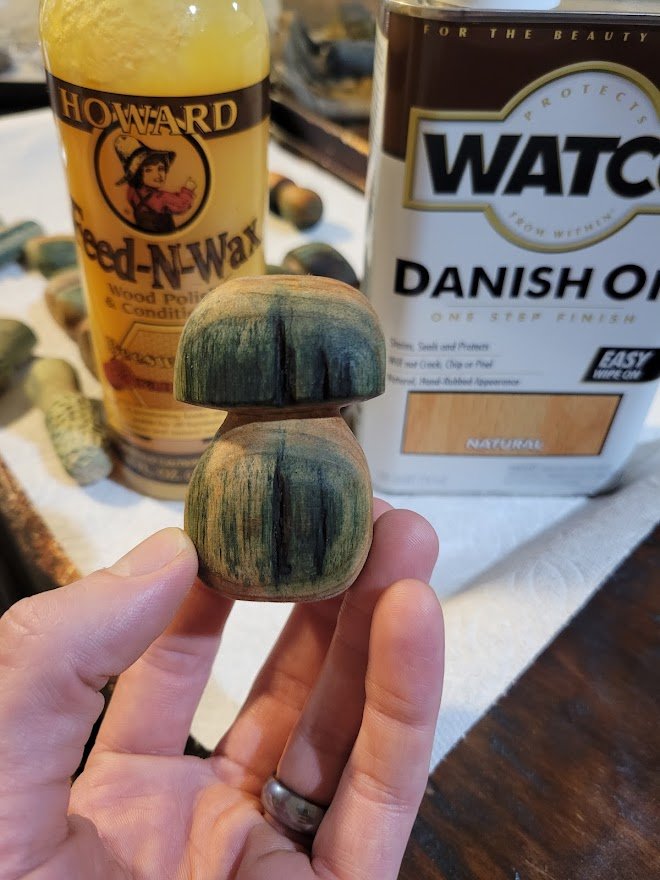
Just a little more work to do before your adorable porcini is ready to plop on a shelf, give to a friend, or be shown off at a craft fair! Since you took your completed porcini shape down to 120 grit on the belt sander, use a 220 grit to go over it and smooth out any lines left from sanding, take care of any burn marks or imperfections, etc. Continue to sand every surface with higher and higher grits, up to around 1000. Once you’ve sanded with 1000 grit, either use an air compressor or wash your piece in acetone (I do both) to remove any dust before you apply your finish. After trying several different finishes and processes, my personal preference is 2x Watco Danish Oil (All-in-one), followed by a layer of Orange Oil/Beeswax wood conditioner. This will deepen and bring out the natural colors of the wood, as well as providing longevity and shine to your finished piece.
And there you have it! A labor of love, without a doubt. From forest floor to finished product, this is (more or less) how I go about making my porcini, and how you can as well. Feel free to check out my other works over in our Chlorociboria Creations!
